 Everyone loves Lego bricks, right? YES! So what better item to have in our Makerspace than an EPIC LEGO WALL?? I saw the amazing Lego wall that Diana Rendina built over at RenovatedLearning.com and I just KNEW that we had to have one like it in our Makerspace. Legos! Libraries! Epic indeed! So how to you build an Epic Lego Wall? Turns out it's not super hard, but there are some tips that I learned that will make your experience flow much smoother. Step 1: Secure Funding Lego base plates are expensive. Our wall required 64 plates that were 10"x10" each. Packs of 4 were $29.99 at the time I bought them from Amazon, making the total cost of the wall $480 plus shipping. Fortunately for me, I had bookfair money that I used to cover the cost. I'd also suggest DonorsChoose.org or asking your PTA... funding is out there! Step 2: Prep The Area Prepare your wall and decide how you are going to secure the plates to the wall. I used a piece of 80.5" by 80.5" plywood (more on the size later, see Step 3) screwed into the wall. The guys from WCPS Facilities supplied the plywood for me - they even cut it and painted the edges for me! They also supplied the adhesive - Liquid Nail. I used a whole gallon! I may have been a little overzealous with the glue.... 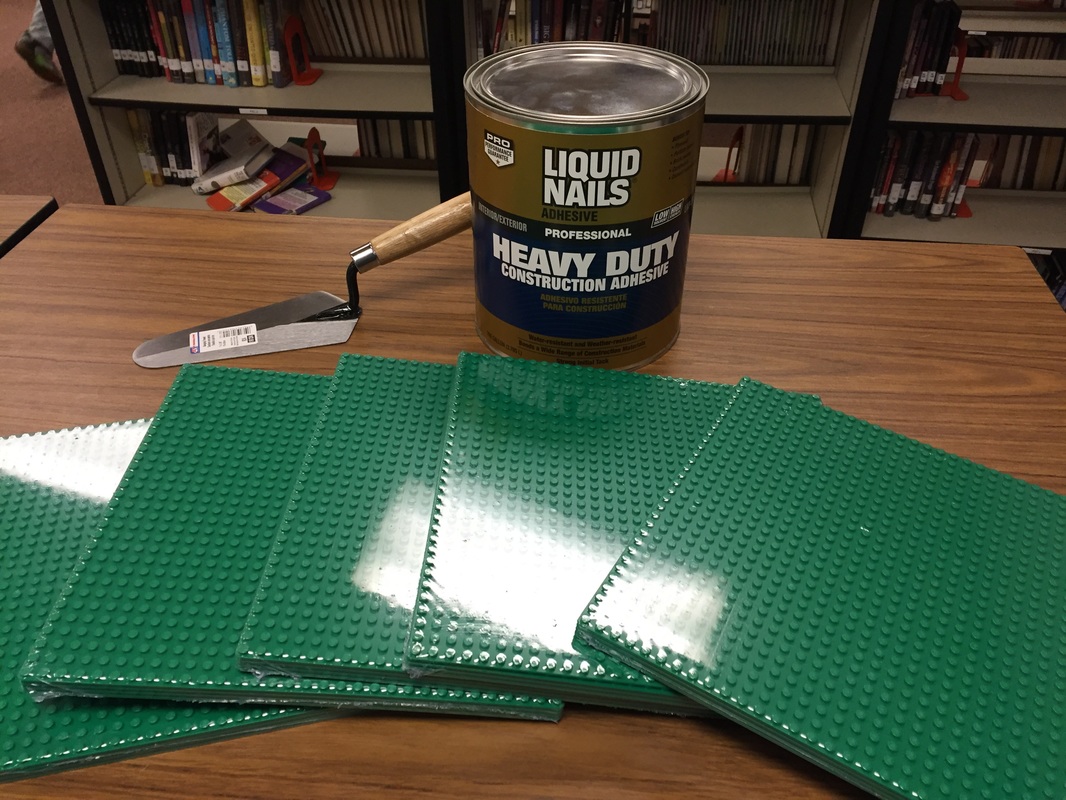 Step 3: Apply Lego Plates to the Wall Wear clothes that can get ruined because the liquid nail does not wash out... I learned that the hard way! I used a trowel to slather each plate with Liquid Nail: 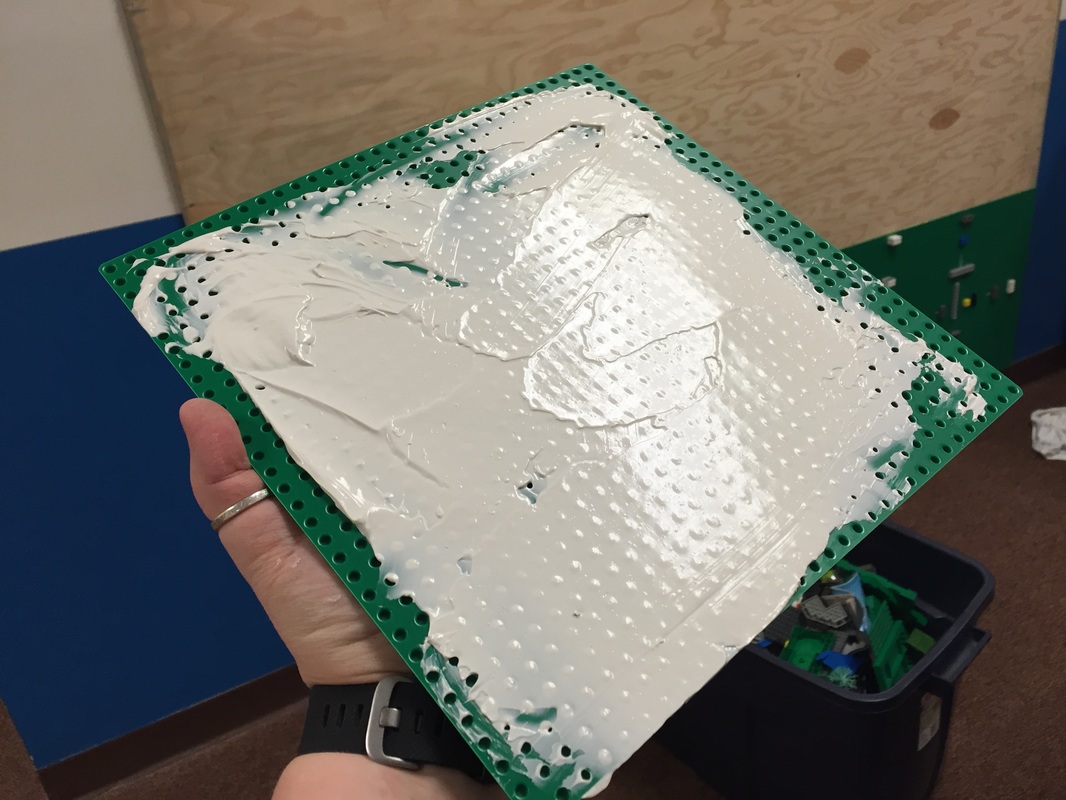 Start at the bottom and work your way up to the top. The most important thing you can do is use Lego bricks as spacers. If you do not, the plates will be too close to one another and the Lego bricks will not span across from one plate to another correctly. There must be a 1 mm gap in between each plate: 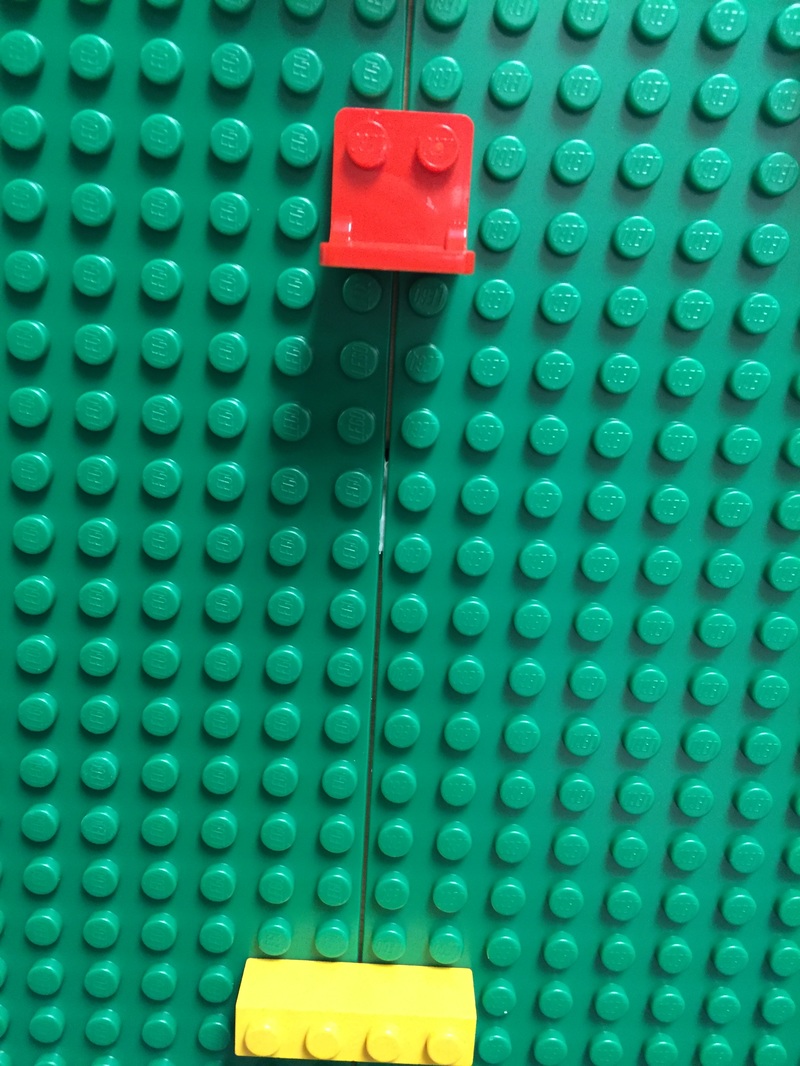 That 1 mm gap is why the wall is 80.5"x80.5" even though it is comprised of 8 plates across and 8 plates down that are 10" x 10" each. Without the extra half an inch, I would have had to cut the plates to make them fit correctly. Be sure to take this into consideration when you are calculating your wall size. Here are pictures of the wall in progress! Step 4: LET IT DRY This might be the hardest part... you need to let the liquid nail set completely, otherwise when the kids pull the bricks off of the wall, you might pull a plate off as well. I let mine dry for an entire week... it was TORTURE! I posted signs on it and told the kids that we would have a grand opening the following Friday. 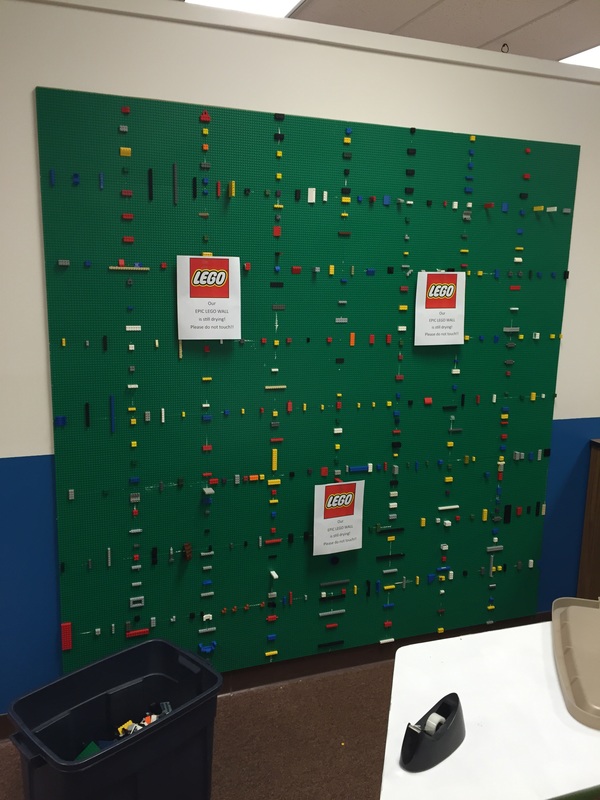 In the meantime, I had plenty of kids willing to sort all the donated Lego bricks that we received. How did I get them? I posted on the local Facebook yard sale pages that I was the new librarian at SPMS and that I wanted Lego bricks for a project. Before I knew it, I had two enormous tubs full with more legos than we could ever use, FREE! I bought plastic bins at Target to have the kids sort them. They sorted them by color, as well as pulling out the minifigures and wheels into their own bins. You could really sort any way that you wanted, but sorting by color worked for me. 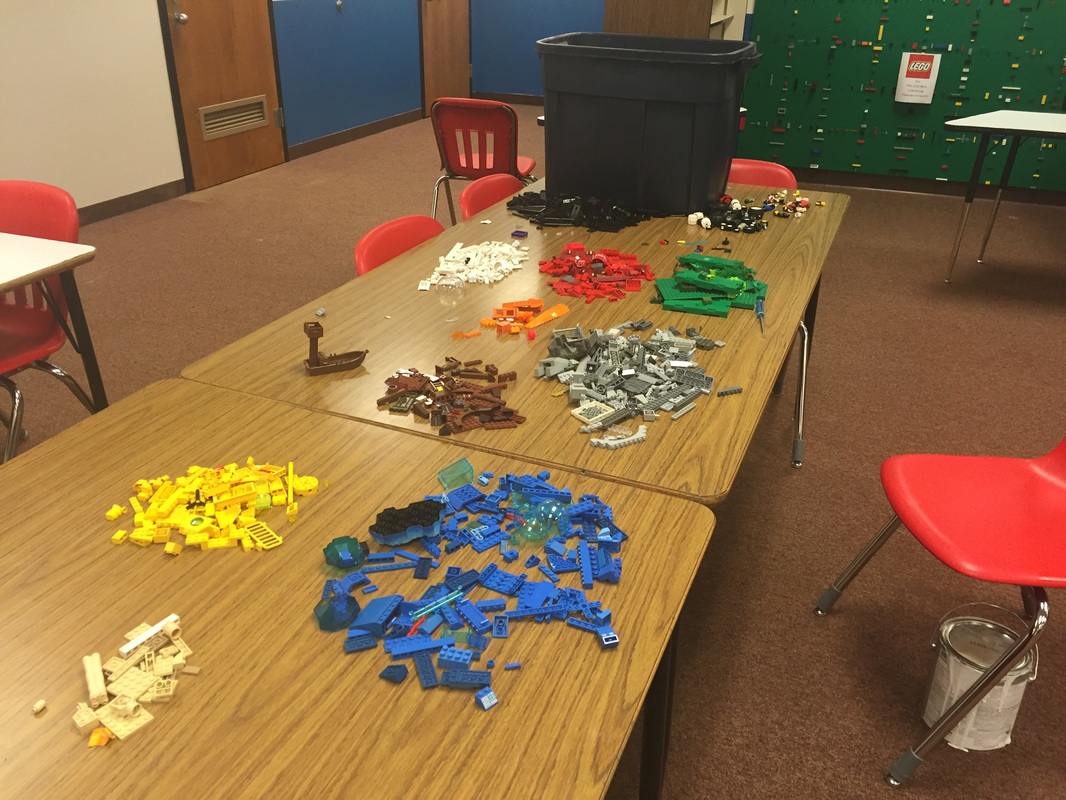 Step 5 : Open It to Building! We had a ribbon cutting ceremony - I even wore my Lego brick earrings that I bought at a craft festival. My awesome and amazing administration team attended! Shortly after, students started to put bricks on the wall... YAY! Incidentally, here is the font I used if you want to make your own Lego Wall sign! Right now I am allowing the students to free build as they see fit. Future design challenges will include art challenges (create a piece of Lego art from all one color), design challenges (move a ping pong ball from one place to another on the wall, like Plinko), and more! So now the Epic Lego Wall at SPMS is open, and EVERYTHING IS AWESOME!! Stop by and build, we would love to see what you create!
1 Comment
Jona french
12/24/2015 06:33:21 am
Thanks for this detailed description of how you planned and implemented this. Hopefully others try it out! Your comment will be posted after it is approved.
Leave a Reply. |
About the AuthorHi! Welcome to my blog! My name is Christine Hurley. This is my 17th year of teaching - I've taught Kindergarten, 4th grade, elementary media, and now I am in my 6th year of teaching middle school media! Archives
September 2020
Categories
All
|
 RSS Feed
Proudly powered by Weebly