 Stop Motion animation is an amazing creative tool used to make really cool movies... think Nightmare Before Christmas, Wallace and Grommit, the Lego Movie, Coraline, Rudolph the Red Nosed Reindeer, and Shaun the Sheep. It used to be a time-intensive, tedious process that was nearly impossible for students to complete. To complete a stop-motion movie required extensive backgrounds, complex models of characters, and super expensive equipment.... NO LONGER! Using the app Stop Motion Studio (a FREE app!), students are able to easily create really awesome movies using the principles of stop motion animation! Stop Motion Studio allows the students to take photographs and adjust the frame rate of how fast they play. FUN FACT : Most stop motion animation movies are filmed at 24 frames per second (fps)... that means for every one second of movie, there are 24 pictures taken! CRAZY, right??? Watch how easy this is... and check out how I use the "onion skin" feature to see through to the last picture I took. It really helps with aligning the photos and keeping the animation steady: And here is the finished movie... Pretty neat, right? Just WAIT until you see what the students did with it... we gave them the instructions and they ran with it. I want to give you some tips that we learned through trial and error. 1. Use the "onion skin" featureOne of our 6th grade science teachers came to the library to have her kids animate the rock cycle. It was our first attempt at stop motion animation and we didn't know what we didn't know... but we went into it with a "we can totally ROCK this" (see what I did there? HA HA!) attitude. Their movies came out okay, but we both realized that had we known about the onion skin feature that they would have been even better. The backgrounds jumped around some, and the kids had a hard time remembering from class to class where they left off the previous day. Here is a sample so you can see what I mean: 2. Use an iPad stabilizerIf you use some chairs or a book stand to stabilize your iPad, it will cut down on the backgrounds jumping around and overall improve the quality of the video. 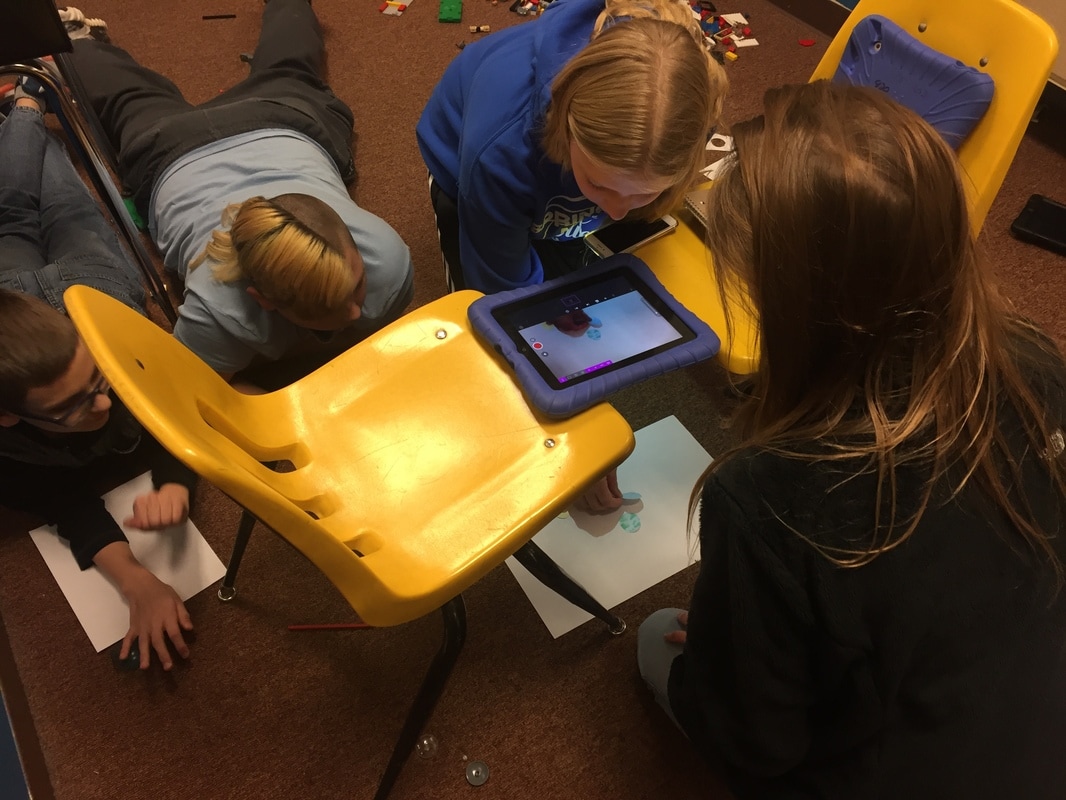 You could even build your own iPad stand out of K'NEX, like this creative student! 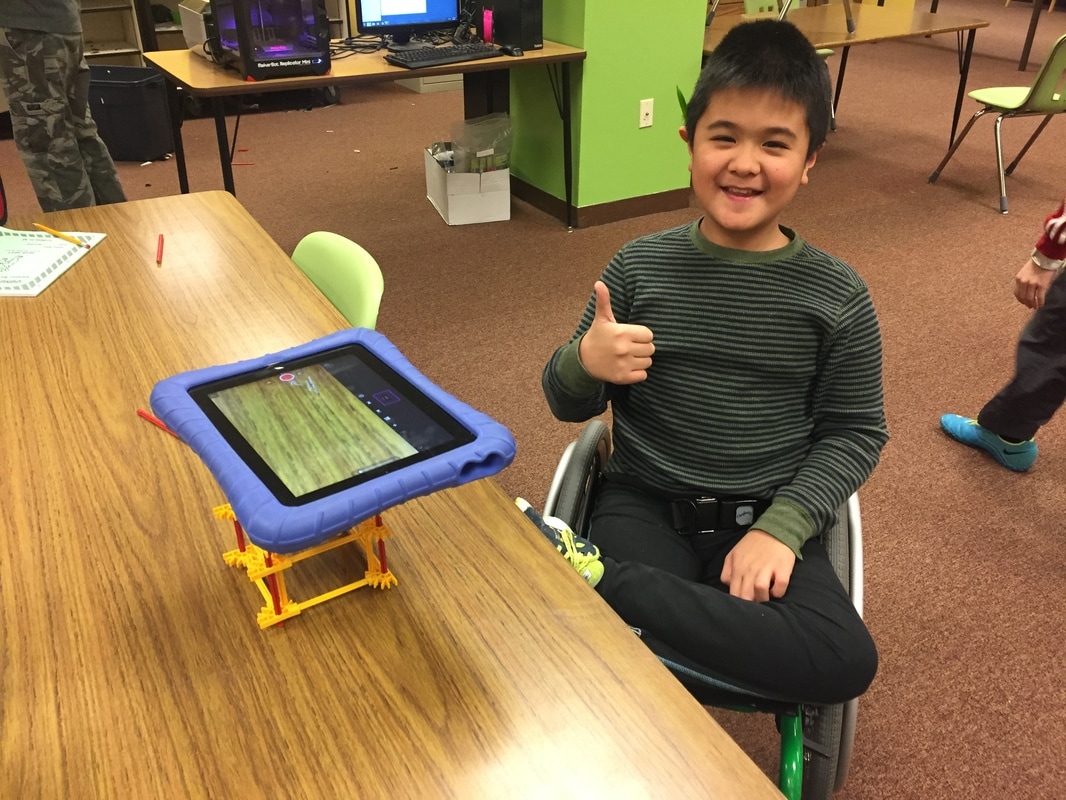 3. Take it to the next level!When the movie is finished, have your students take it to the next level by exporting it to their camera roll and then importing it into iMovie. They can add titles, sound effects, and maybe even use GarageBand to make a custom soundtrack, like these kids! We had students create models of the rock cycle; how the digestive system processes food; and moon phases, seasons, and solar eclipses. While my students' stop-motion movies are all science content based, you certainly could have students create and tell stories, illustrate a historical event, or document the creation of an art project. The possibilities are endless and are only limited by your creativity!
How will YOU use stop motion with your students? Comment below and share your idea!
0 Comments
|
About the AuthorHi! Welcome to my blog! My name is Christine Hurley. This is my 17th year of teaching - I've taught Kindergarten, 4th grade, elementary media, and now I am in my 6th year of teaching middle school media! Archives
September 2020
Categories
All
|
 RSS Feed
Proudly powered by Weebly